It’s been almost four months since Pie and I moved into our brand spankin’ new home in the new home community, Midtown at Clear Creek, and we have been just as eager as you [perhaps] to see our “diggings” finally evolve into decorated “digs”!
The great thing about getting a brand new home built, is it’s almost impossible not to be in love with every bit of it. We got to pick just about every design detail for the interior of our home, so if there was anything we didn’t like, we only had ourselves to blame. (But luckily, that’s not the case!)
That being said, just because we got to choose so many design aspects of our home, doesn’t mean we got everything on our dream list. There were a few things that we decided were not worth the money and other things that we decided we would DIY. This meant that before we even stepped into our new home, we already had a list of projects that we wanted to get done as soon as possible.
Our list of home projects has finally dwindled from a million things to do to just 50 or so, so now that the dust has literally settled, we can finally reveal how everything turned out with our personal touches in place! Get excited!!!!!! Eeeeeeee!!!!
Just to refresh, here is what the layout of our home looks like (except ours is flipped!). The first floor consists of the kitchen, dining room, living room (all in one big open space with wide sliding glass doors leading to the patio), study, bathroom, mudroom, and pantry. The second floor consists of three bedrooms (including the master), two bathrooms, and a laundry room. Our basement is currently unfinished.

Kitchen
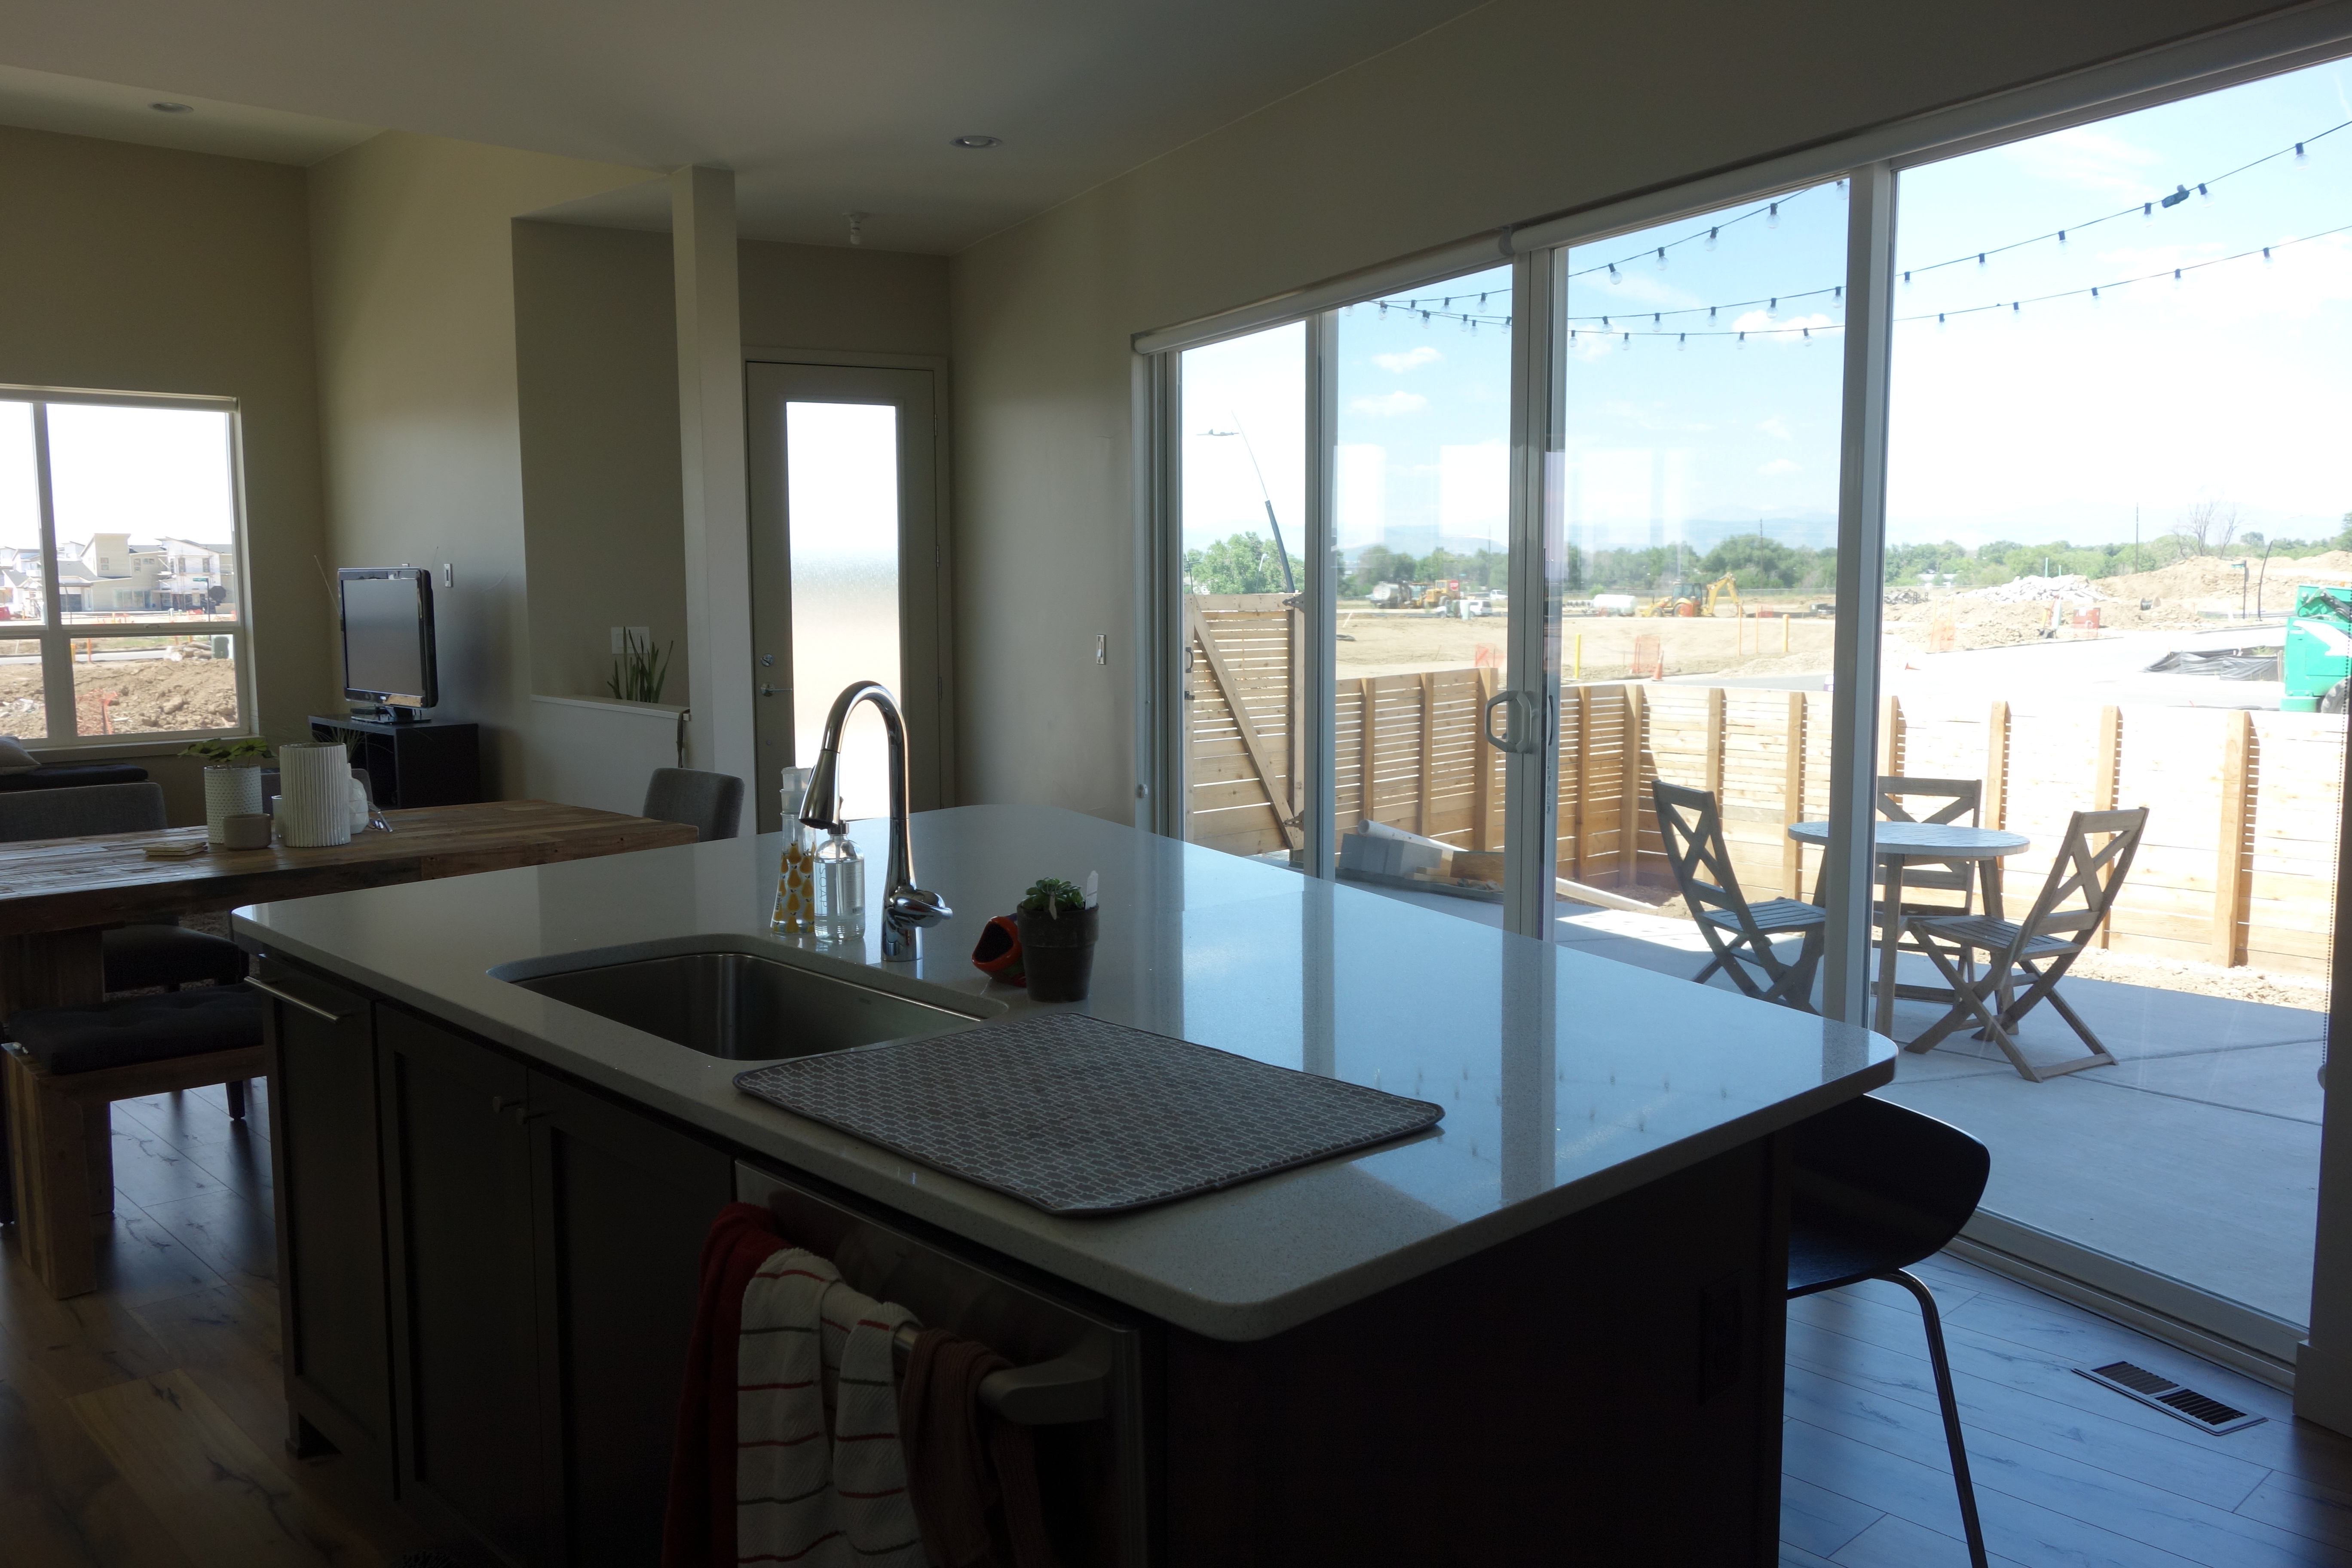


I’ll start with my favorite room in the house, the kitchen! I’ve always dreamt of having a kitchen with neutral colors and not the typical orangy, outdated cabinetry, so this room is always a treat to walk into and drool over.
If you’ll remember from our initial photos of the home un-decorated, there was no hardware on the cabinets. This was one upgrade we hubby decided to DIY. Our builder would have charged $1100+ to install cabinet hardware throughout the house. Yikes! We purchased the drawer pulls from Lowe’s, upper cabinetry knobs from IKEA, and a $1 cabinet hardware install template from IKEA and spent no more than $200 on this entire project. Winning!!!! I initially thought that the kitchen could do without the cabinet hardware, but after seeing the finished look of the kitchen with the hardware, I’m smitten! And it has definitely come in handy to keep greasy or wet hands off the cabinets!
When we were selecting cabinet options for the kitchen, we had the option of choosing all open shelving, a combination of open shelving and cabinets, or all cabinets. We chose the middle option and went with a combination of shelving and upper cabinetry! If I haven’t already mentioned, I’m a OCD-neat-freak-out-of-sight-out-of-mind kind of person and I wasn’t sure how I’d do with having items sitting out on the open shelving, but it’s worked out great to have a little bit of open shelving where we can display decorative items and glasses. We definitely haven’t missed the space/cabinets we sacrificed to have this shelving, as there is plenty of cabinet space for our appliances, dishes, and cookware.
We also chose a small upgrade of adding a built-in shelf to the outside of the kitchen island and although it’s just a small detail, it has been a nice place to add a few decor items and store our cookbooks.
My other favorite upgrade in the kitchen is the frosted glass upper cabinetry above the fridge. It adds such a fun touch to the kitchen. Although, I will say that the OCD in me is driven a little nutty by certain bright objects showing through the glass more than others, so I’m constantly rearranging stuff in those cabinets to not look so cluttered (this can usually be accomplished by simply pushing things further towards the back of the cabinet).
And my absolute favorite, favorite upgrade in the kitchen is the white sparkly quartz counter tops. We carried this quartz material throughout the house in the bathrooms and I couldn’t be happier with it! In our last apartment, we had black granite and I nearly went insane trying to keep the counters clean and streak-free. With this white quartz, I never see streaks! Plus, you gotta love the sparkle bits in it!
Dining Room
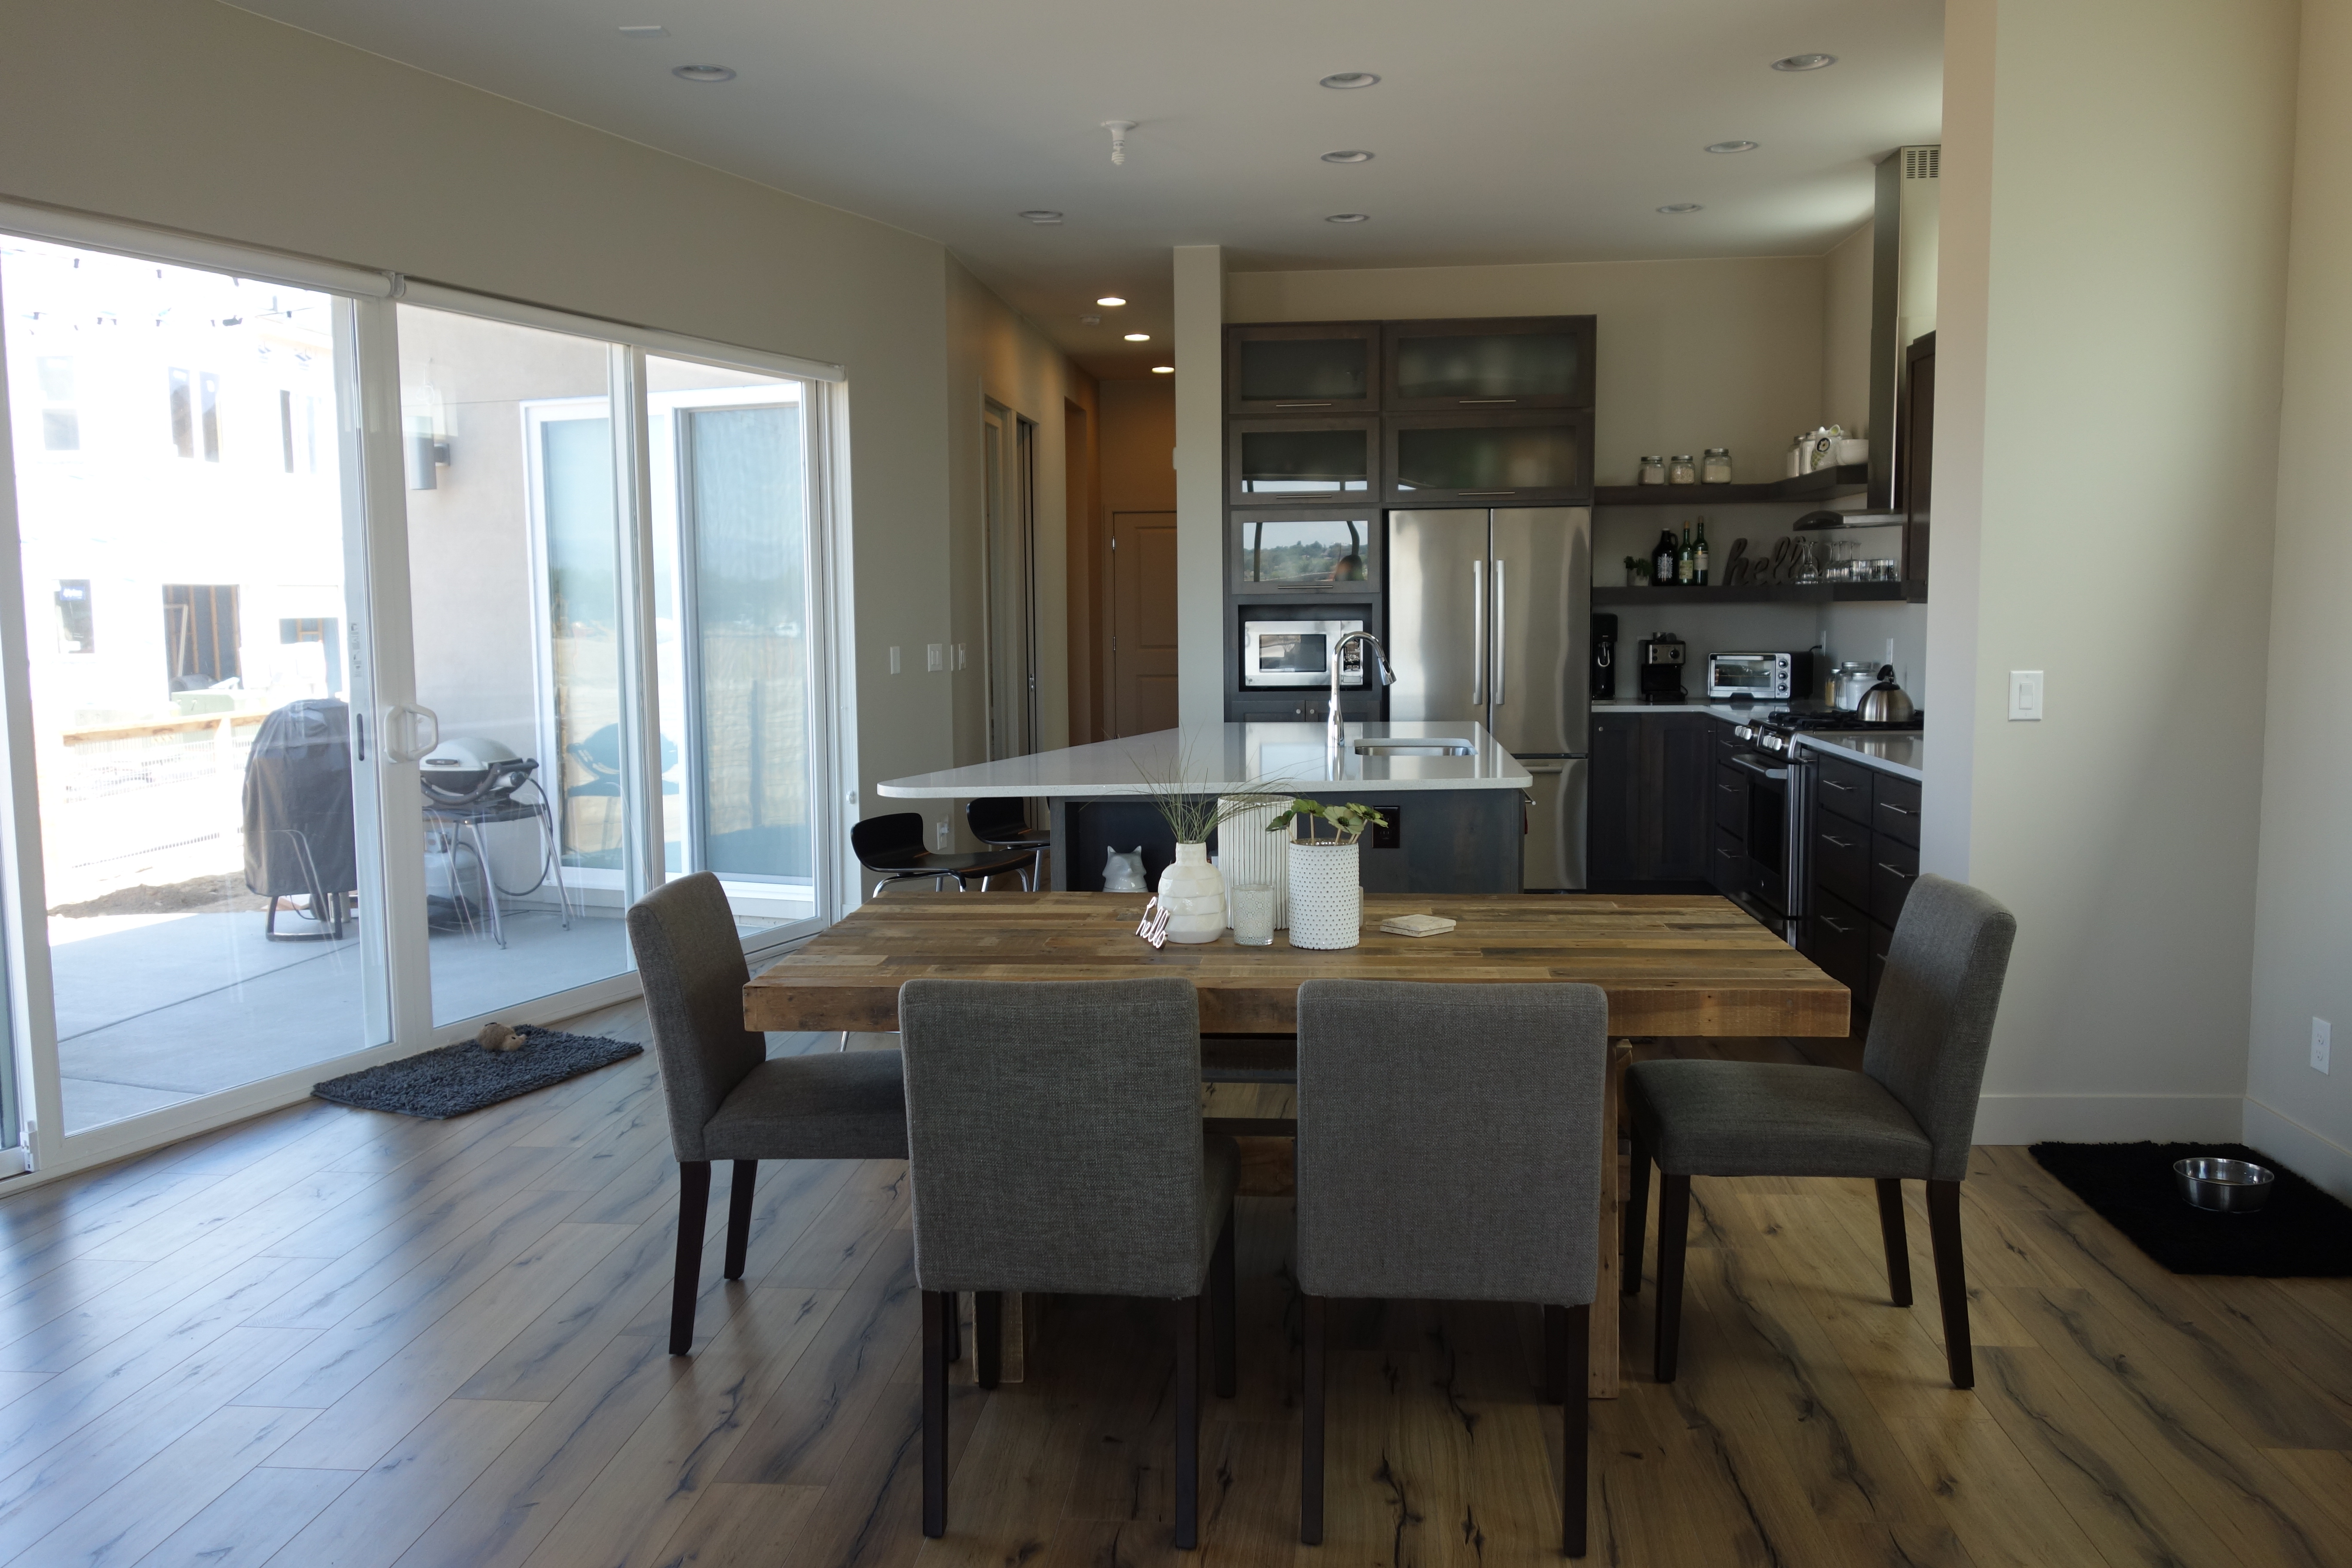
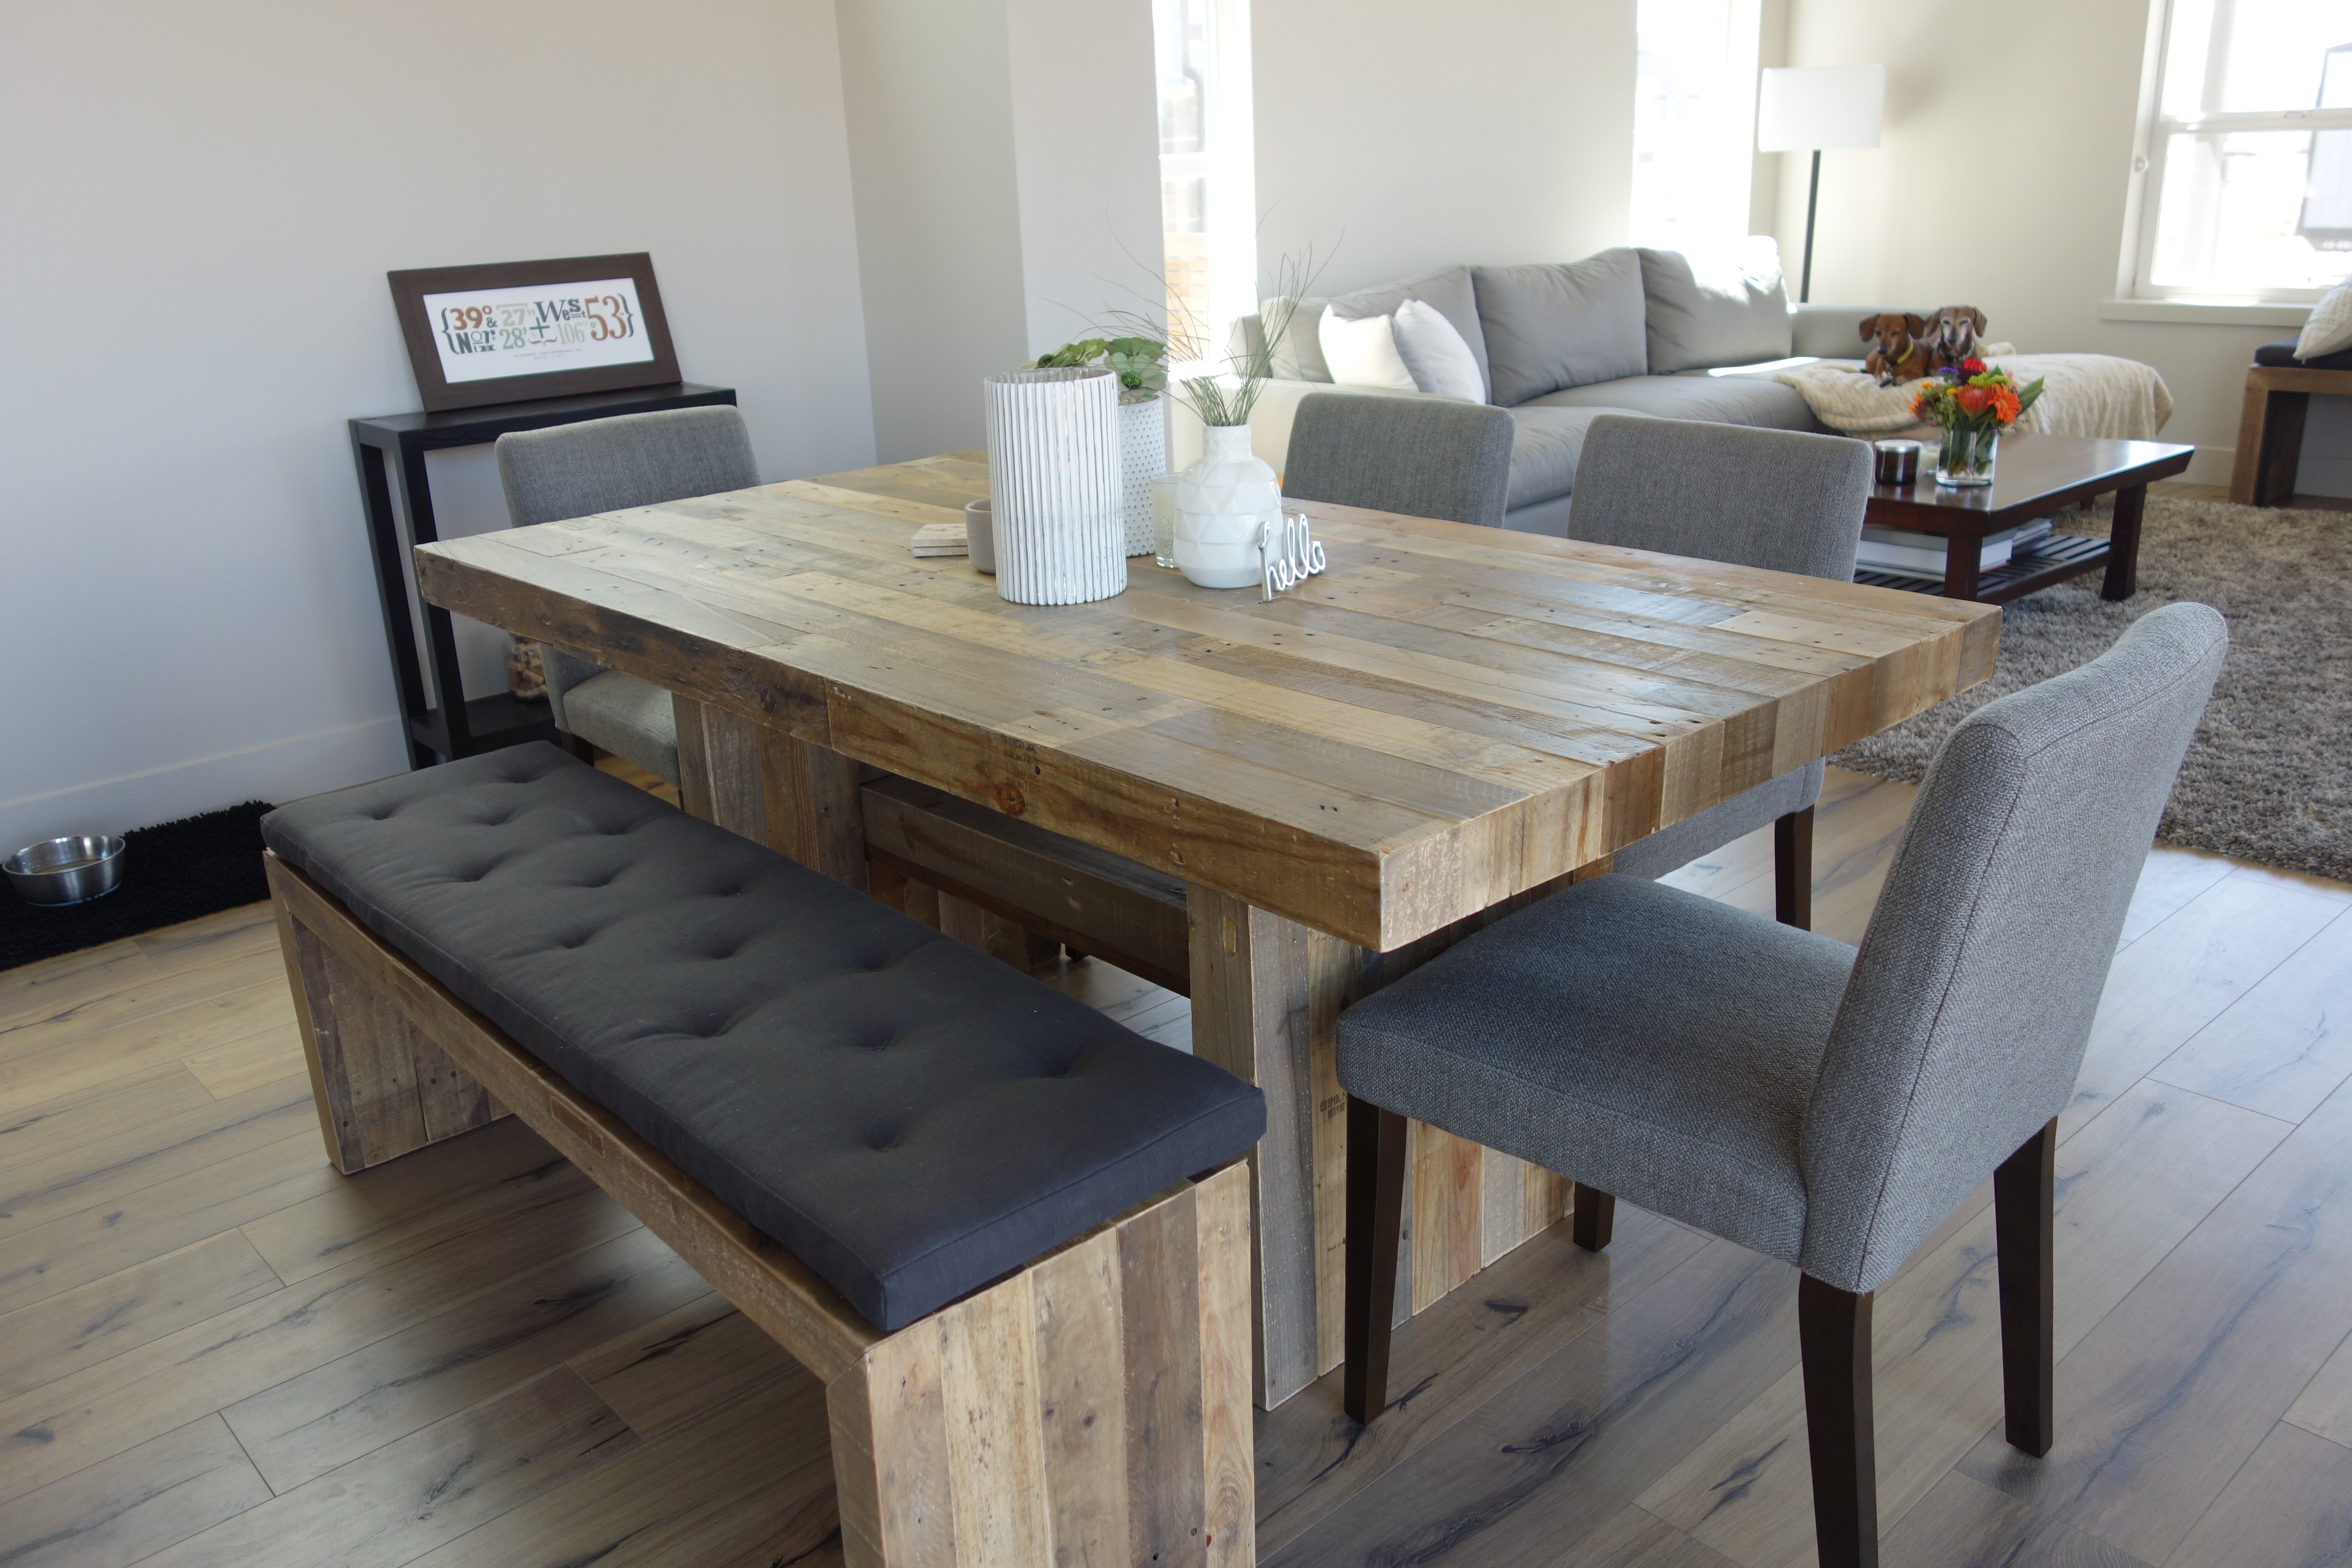
Not much to say about the dining room other than we love the open layout and amount of seating we have between the kitchen island seating and the dining room table seating. The Emmerson dining room table from West Elm was our first purchase for the house and we absolutely love it! It took us quite a while to decide on a table, but in the end, we were sold over the fact that the reclaimed wood and rustic look of the table would hide scratches and spills. We ended up getting a lot of seating for our new table because I liked the benches, while hubby liked the chairs… so we bought both!
Eventually we will decorate the dining room with some sort of credenza or buffet along the back wall, but for now, there is an awkwardly small table in the back.
Living Room
While it may be very trendy right now to have a home with an open layout, what many people don’t consider is having to decorate a big area like that. In our case, we had an awful “first world problem” of trying to decorate and coordinate the kitchen with the dining room with the living room with the kitchen with the dining room….okay you get the point!
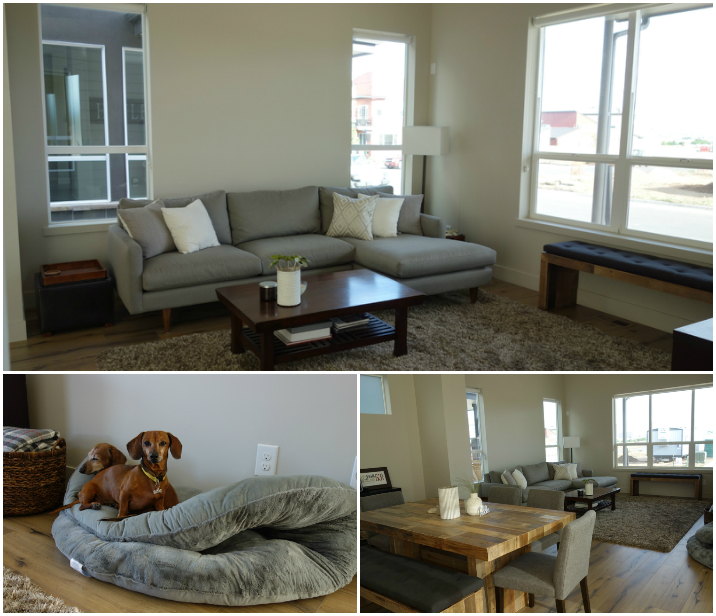
Our couch was another home purchase that took a lot of thought between choosing just the right color, fabric, and style. As you can see, we ended up with a somewhat rustic, grey & white theme for the big open space on the first floor. Even the pups got their own new, grey bed to lounge on (it’s actually a papasan cushion folded over — the dachs love to crawl in it and cozy up, so we call it the “Taco Bed”). The hope was that these neutral colors will be classic enough to not go out of style in a few years. (I change my mind easily though, so we’ll see how that goes!)
Pantry

The pantry at the back of the house has been so awesome! We store all of our food here and I could not be more thankful for the space it saves in the kitchen. We love our trips to Costco! I don’t know who takes up more space — Pie with his almonds or Em with her mac ‘n cheese! We could have done a few more upgrades with the pantry as far as fancy shelving and baskets, but we were pretty happy with just having a bunch of shelves. The only thing we upgraded from the “standard” option was adding the “wrap around” L-shaped shelving.
Mudroom
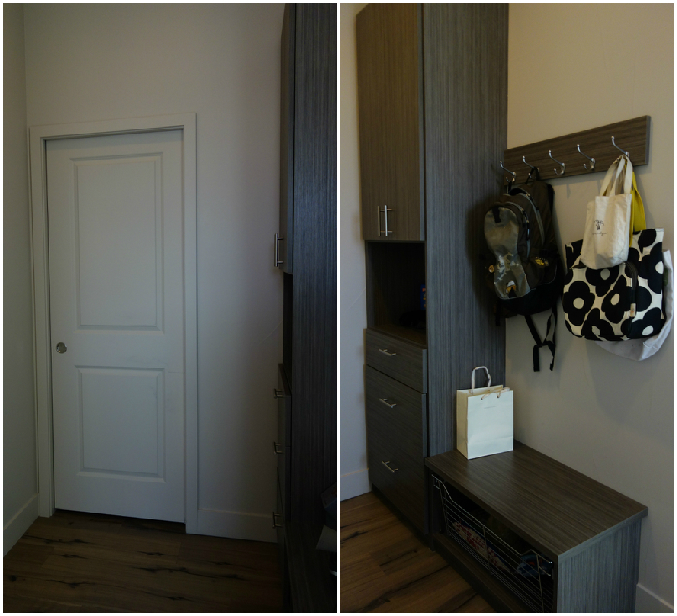
The mudroom has been a nice space for extra storage close to the garage to grab on our way out the door.
We chose to have a pocket door added to the pantry, which is next to the mudroom, and it is so nice to hide all that stuff in the pantry!
Office/Study
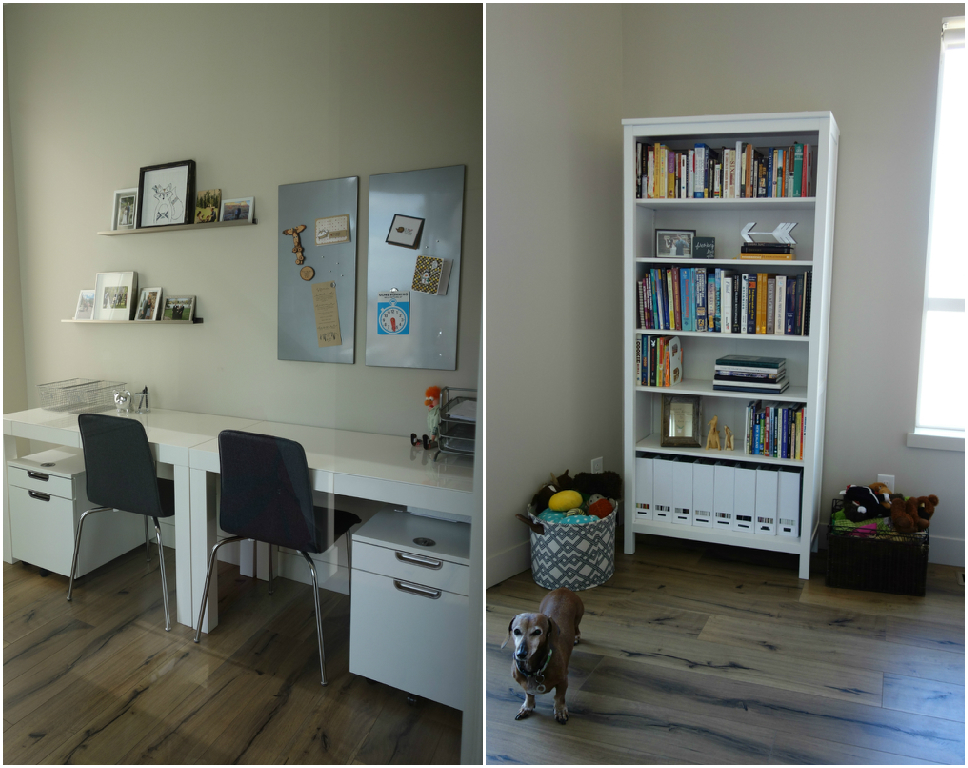
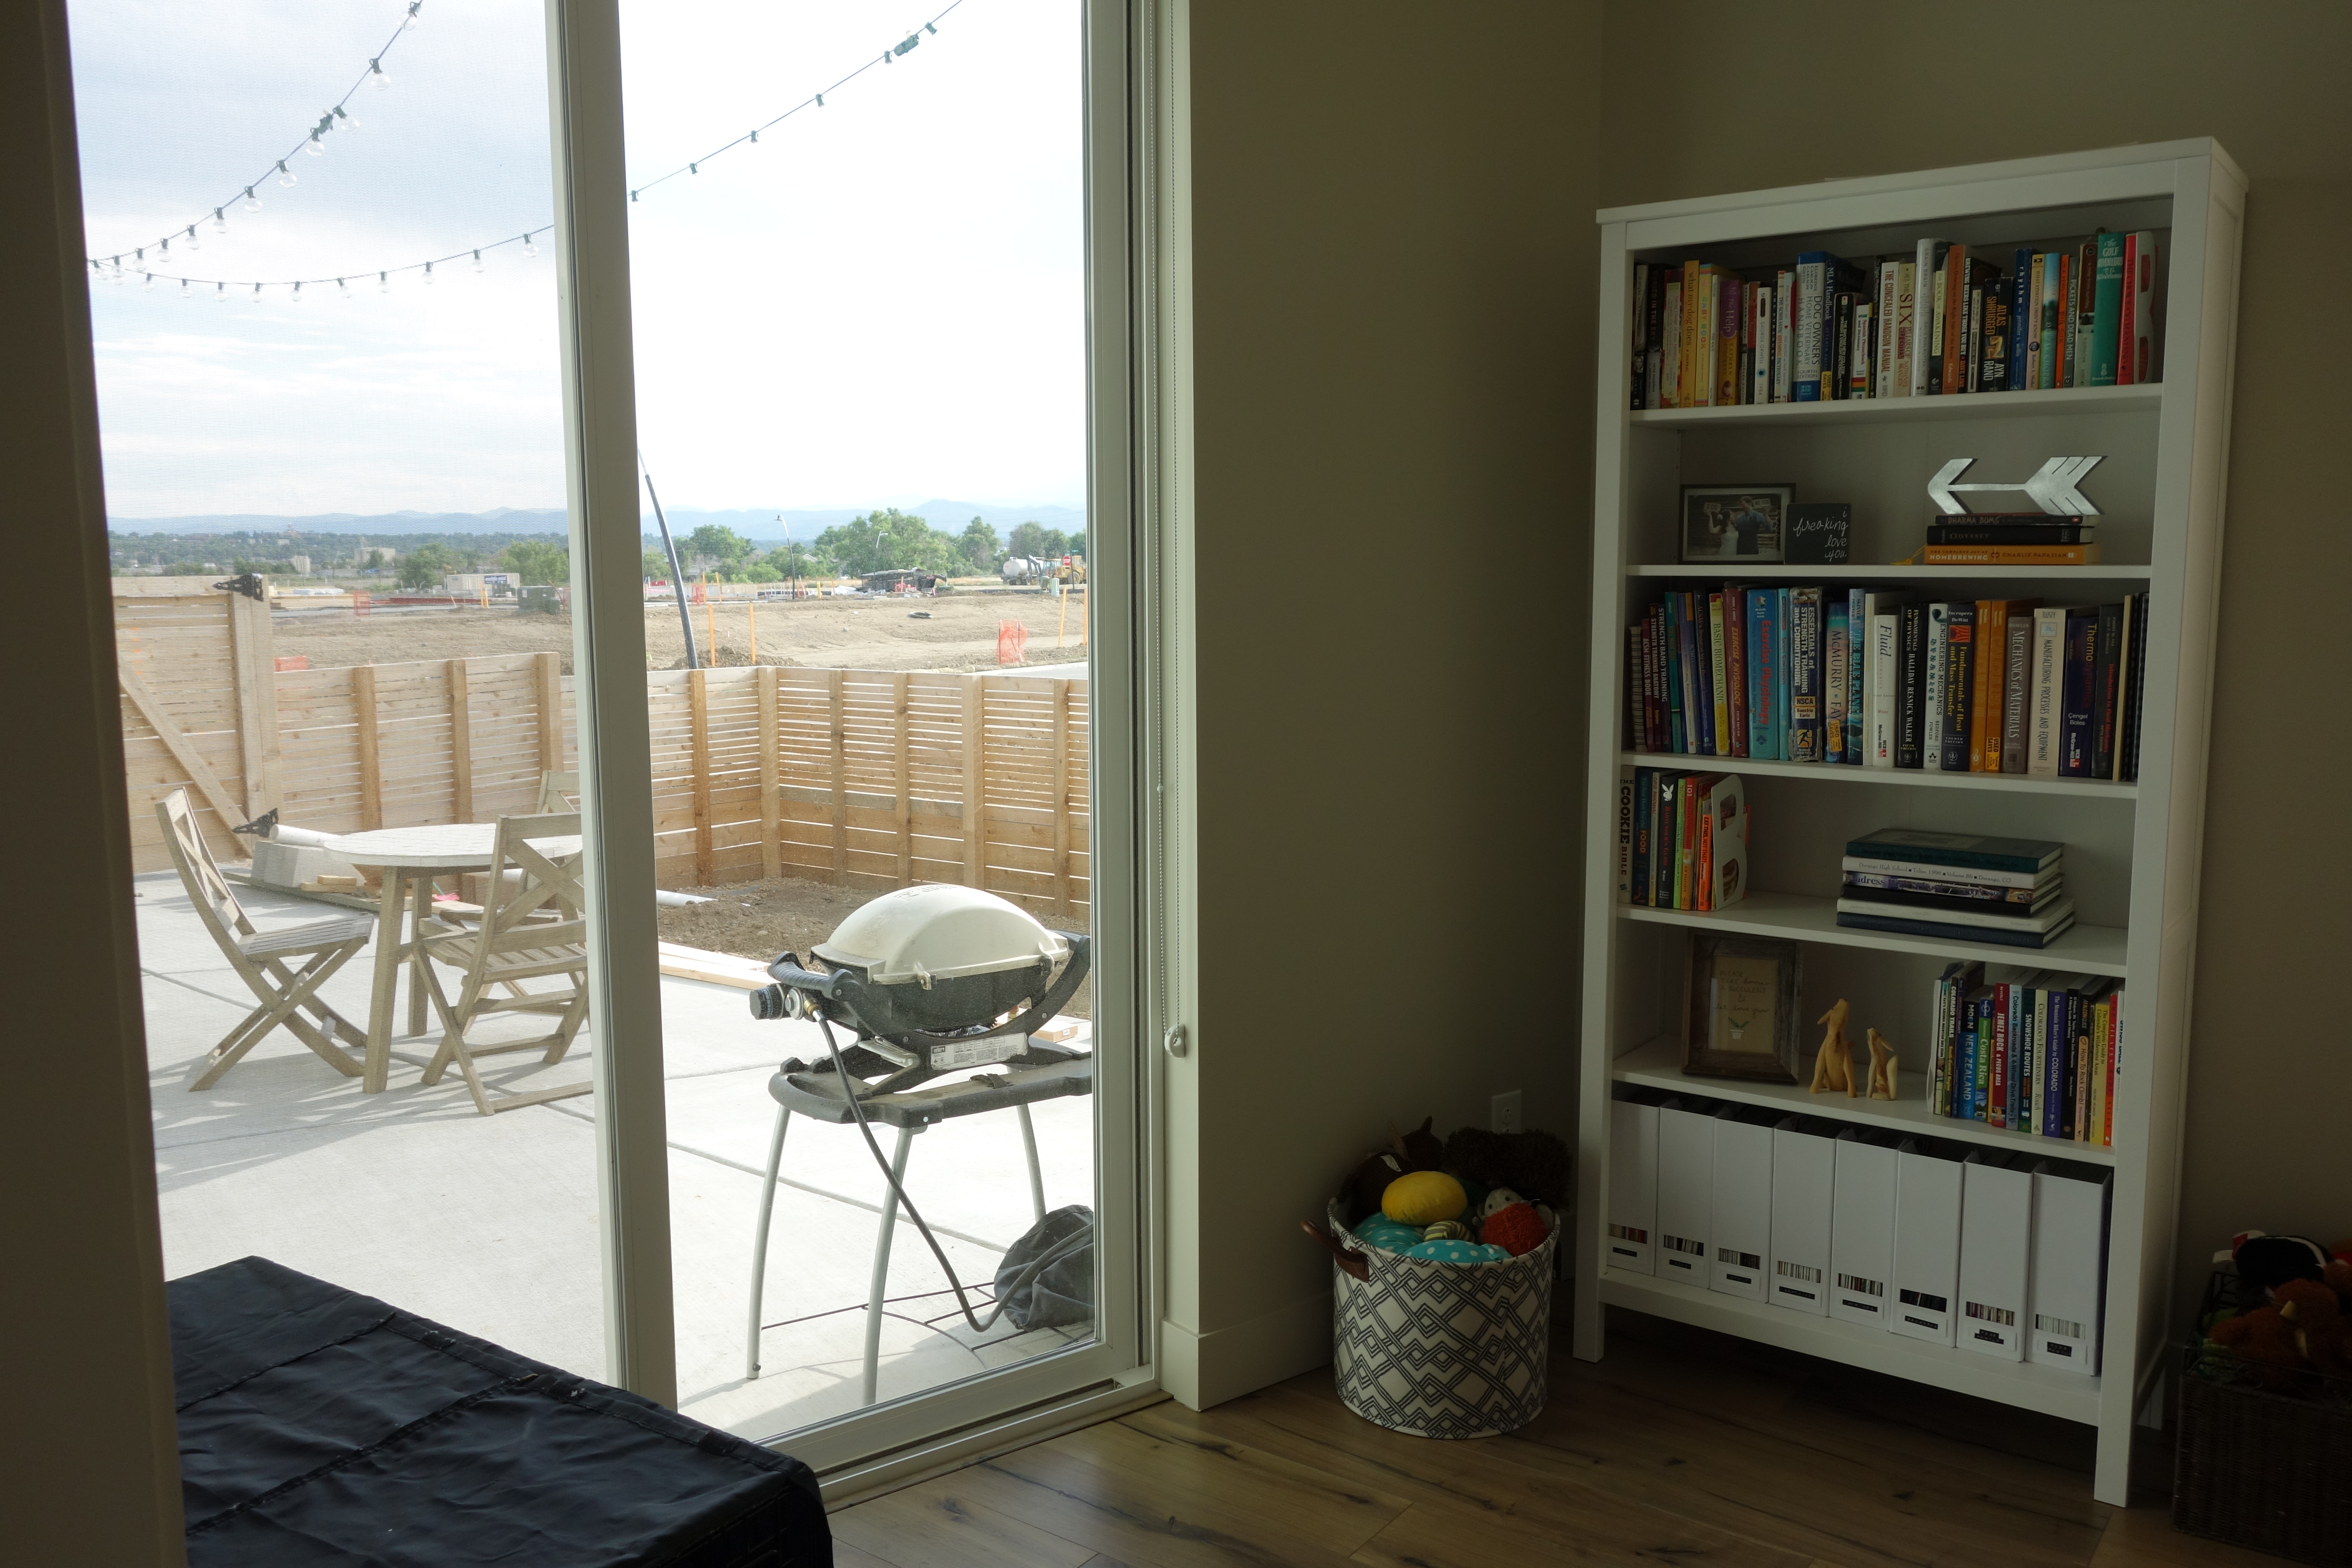
Our office/study was one of the last rooms in the home to get “put together”. For weeks we had several boxes piled up in this room that contained our books (many of which ended up getting tossed). It took me a long time to decide how we would decorate and arrange the office, but it was nice starting from a blank slate since the office is oddly shaped and has very little wall space (one of the walls is actually a glass sliding door to the outside and another wall is a glass sliding door to the hallway).
We purchased two of the same white Parsons desks from West Elm so we would have plenty of space for working when we needed it (my crafting sessions can get a bit out of control). We also purchased “his and hers” filing cabinets from IKEA so we would each have a place to store important documents. The bookcase and magnetic boards are also from IKEA. And lastly, the metal shelving from West Elm is an easy way for us to display art and easily change out photo frames. We went with a white theme for the office and I was a bit worried it would look too much like a teenager’s room, but it seemed to turn out alright!
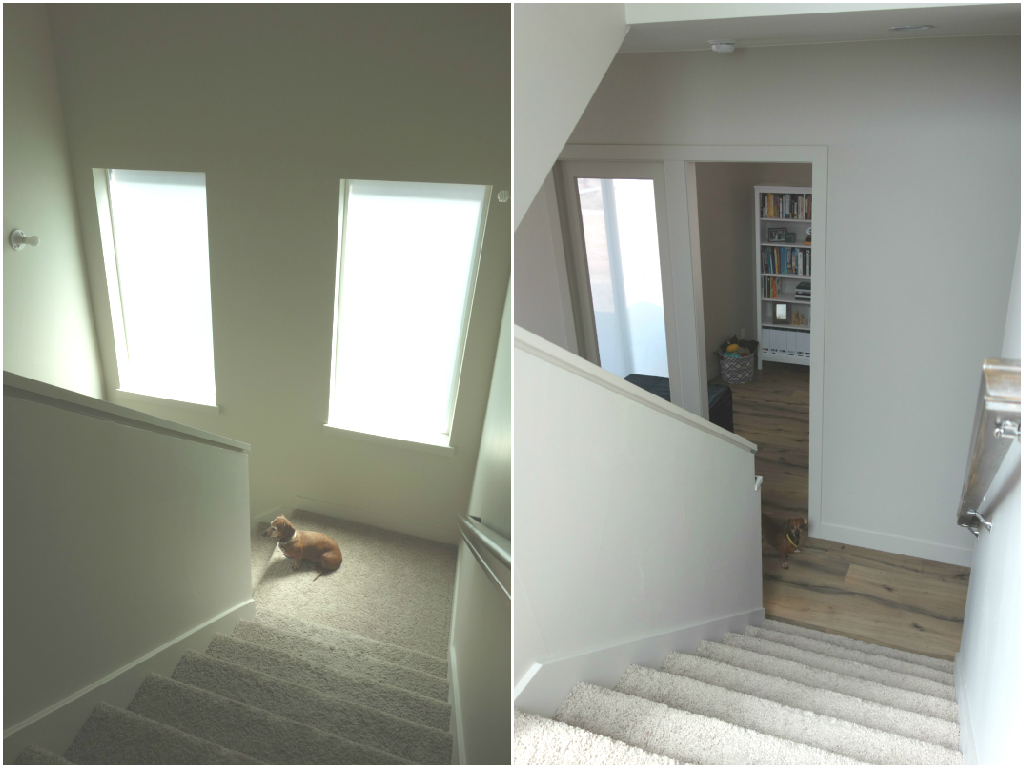
From this picture (above right) of the stairs located right off the study, you can see the super neato glass door to the study. The study also has a pocket door made of glass. Very nice “standard” feature of the home! There is an upgraded option to add another piece of glass on the right side of the door opening. We thought this upgrade was too much of a splurge, but it would have been a cool upgrade to get!
Laundry Room
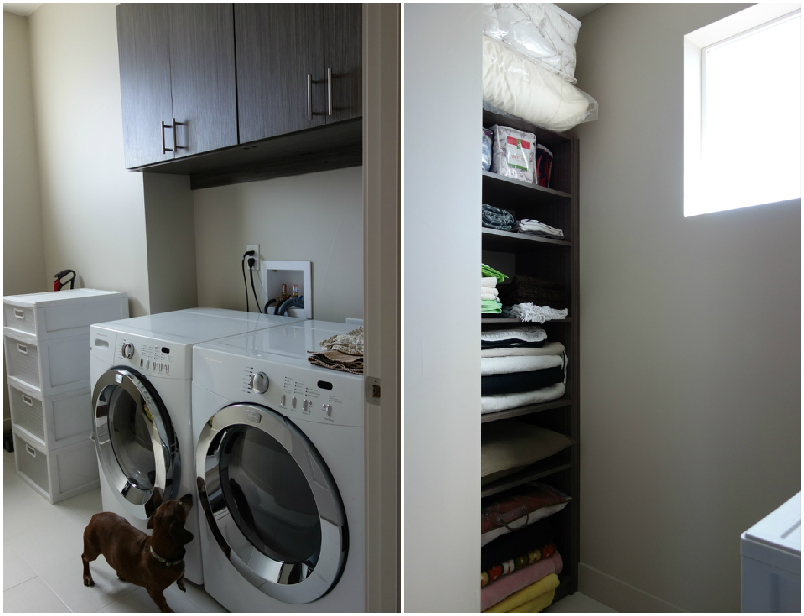
I can’t decide whether having a laundry upstairs is a blessing or a curse. There seems to be no good location for a laundry room when you have a 2-story house. It has been a little bit of a pain trying to hear when the laundry is ready and then making the trip all the way upstairs when you’ve just gotten comfy on the couch. On the other hand, it is nice not having to haul laundry up and down the stairs.
Another future project for this room is a laundry sink. We have connections for a sink, but it’s definitely not a priority project right now.
Guest Bedrooms
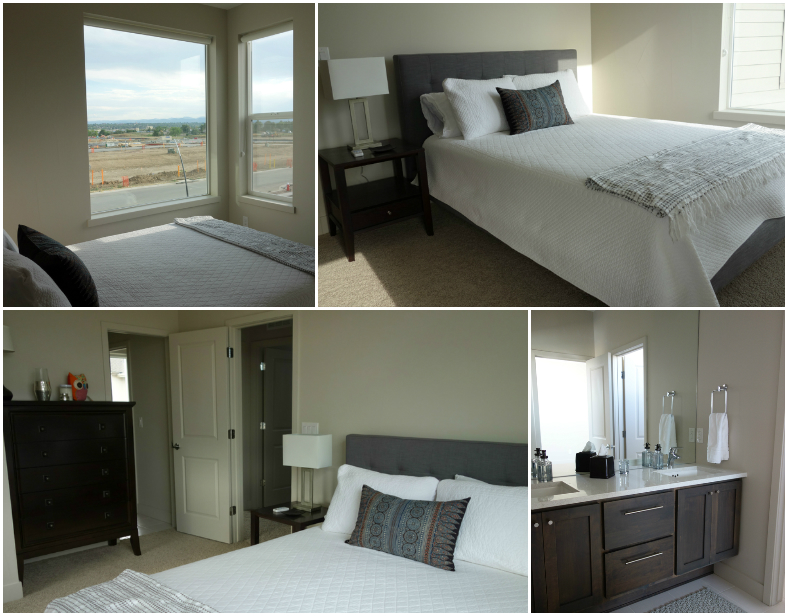
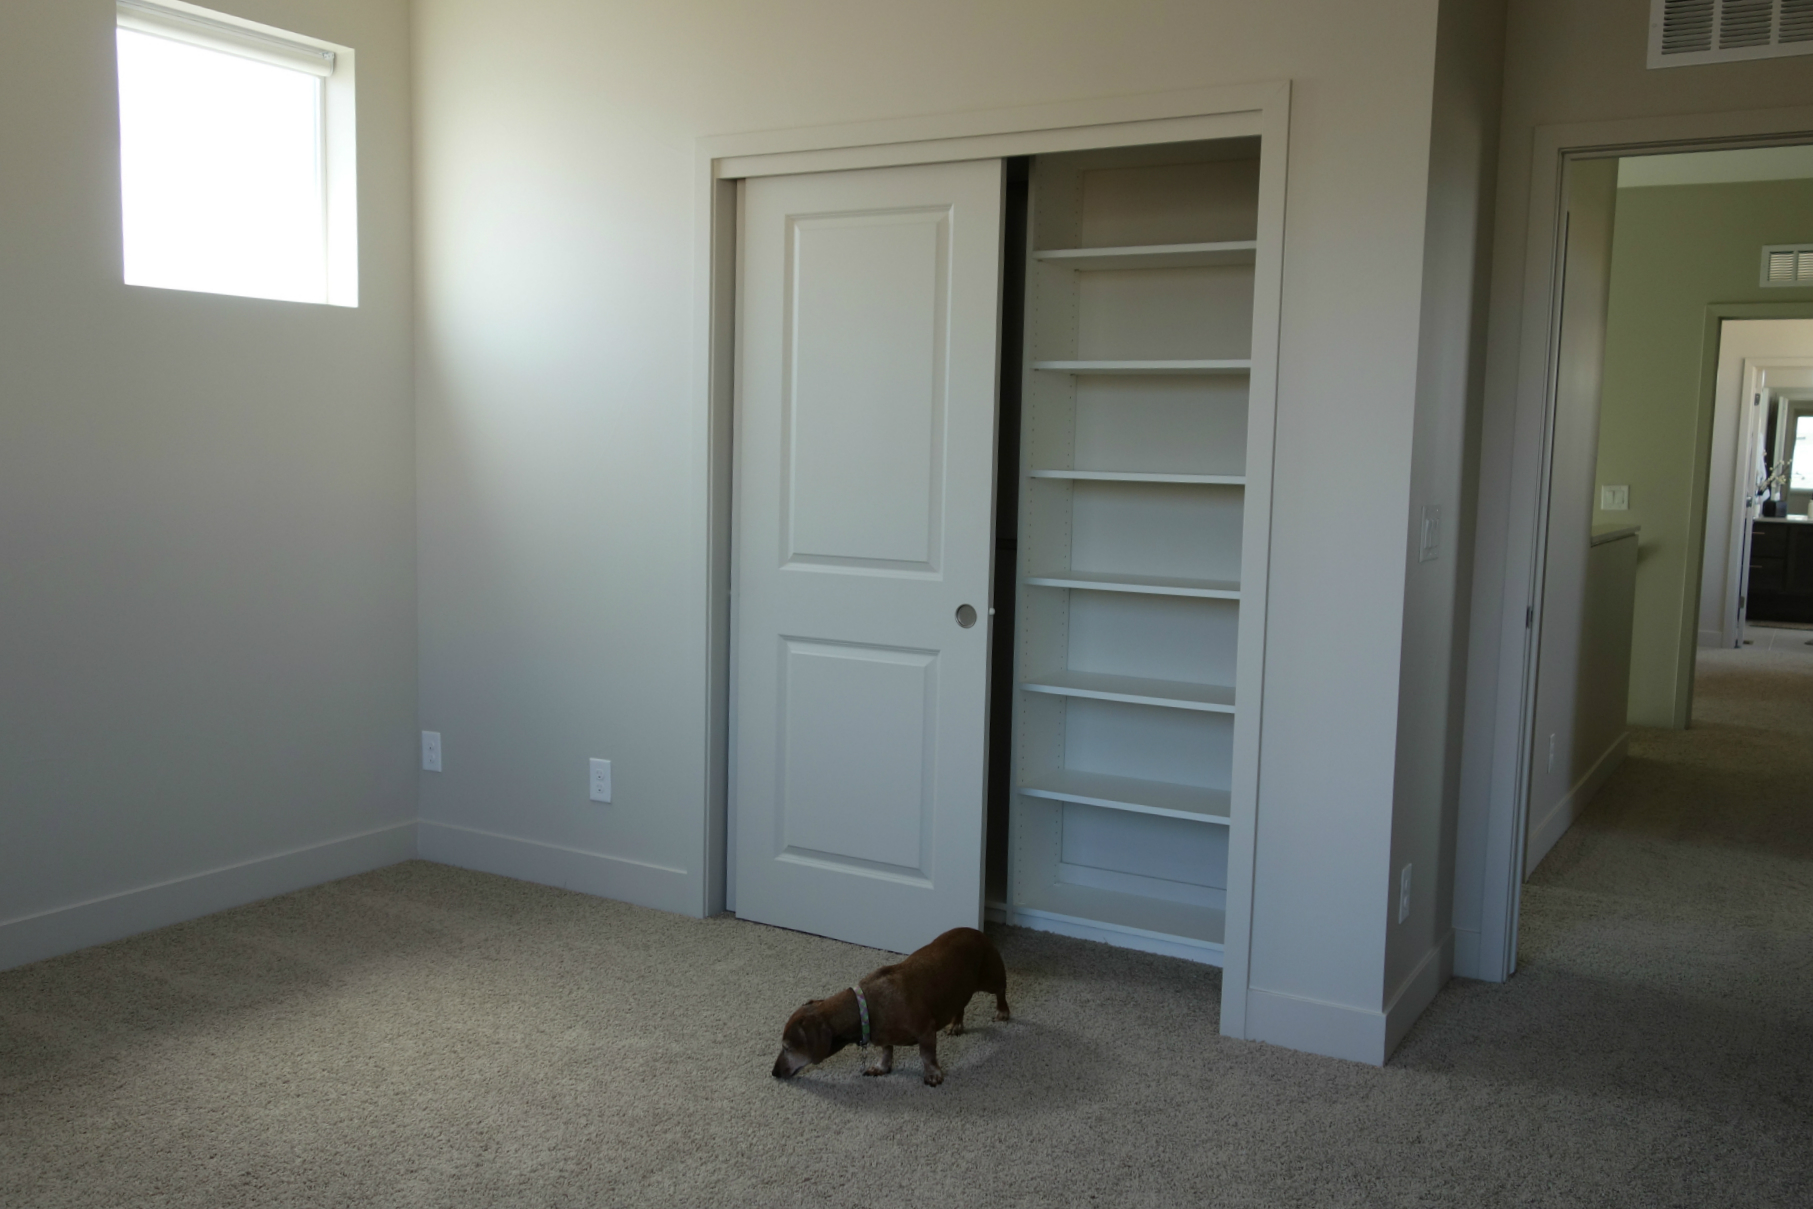
Only one of the guest bedrooms upstairs is decorated and furnished. The other (bigger) bedroom will likely be a nursery/playroom in the (distant) future.
The two guest bedrooms share a jack-and-jill bathroom, so we knew upgrading to two sinks in that bathroom would be essential.
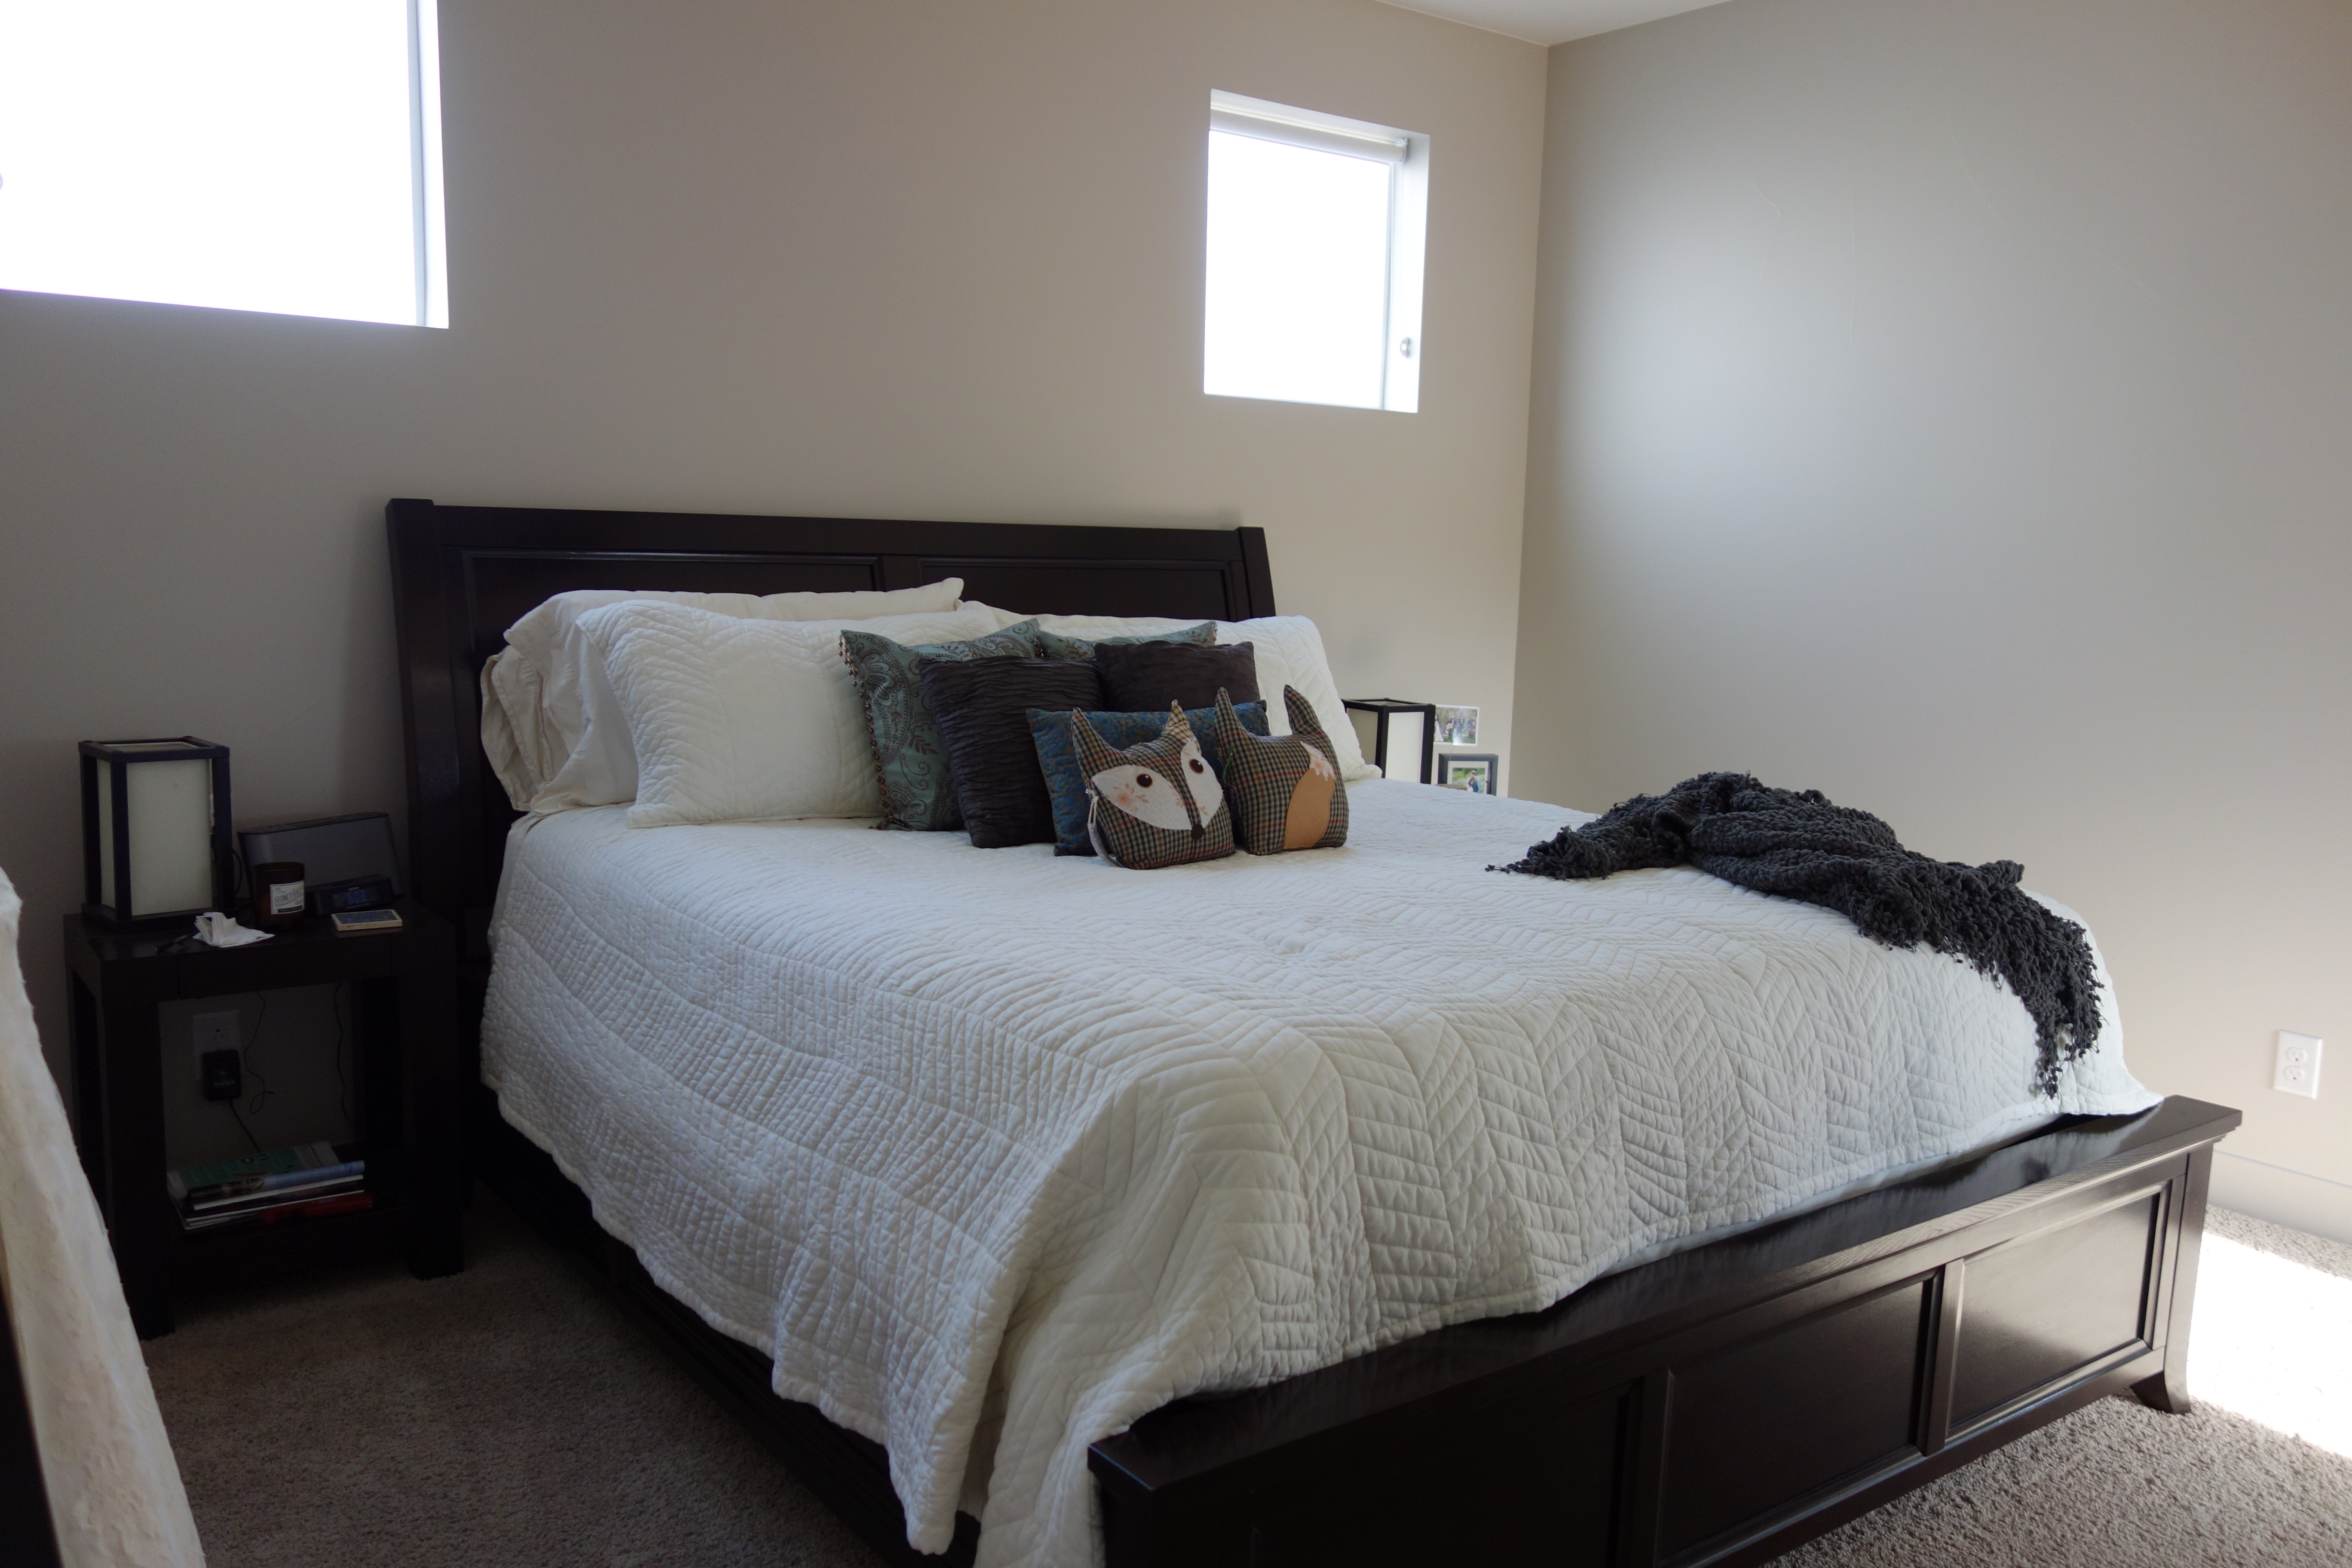
The guest bedroom and bathroom both look minimally decorated, but boy did it take a lot to even pick out that decor and decide on a guest bed!
For now, the guest bedroom still has the awesome view of the mountains. Homes are going up quick in our neighborhood and I bet in a few months time, we won’t have that view anymore! Sad face.
Master Bedroom/Closet/Bathroom
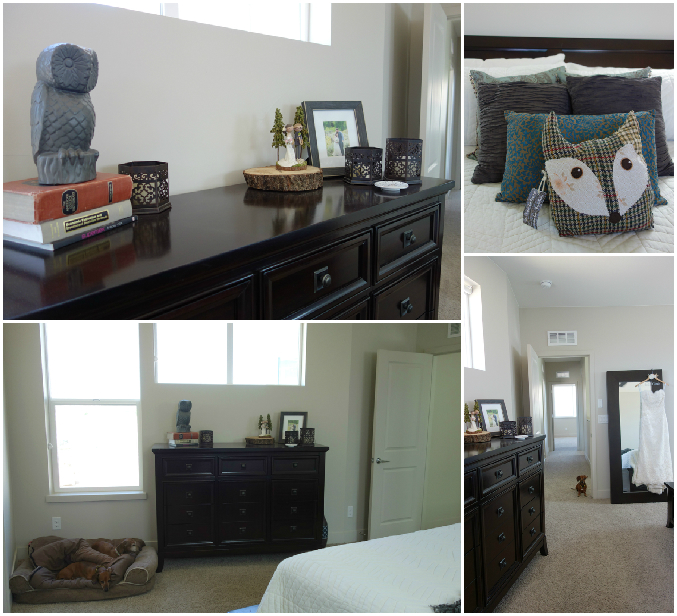

This room needed the least amount of work in our new house (besides trying to locate a few missing pieces of our bed after moving) because our bedroom furniture was one of the few things we took with us from Albuquerque. The layout of the master bedroom worked well with our furniture and even the dachs ended up with their own lounging nook in the bedroom.
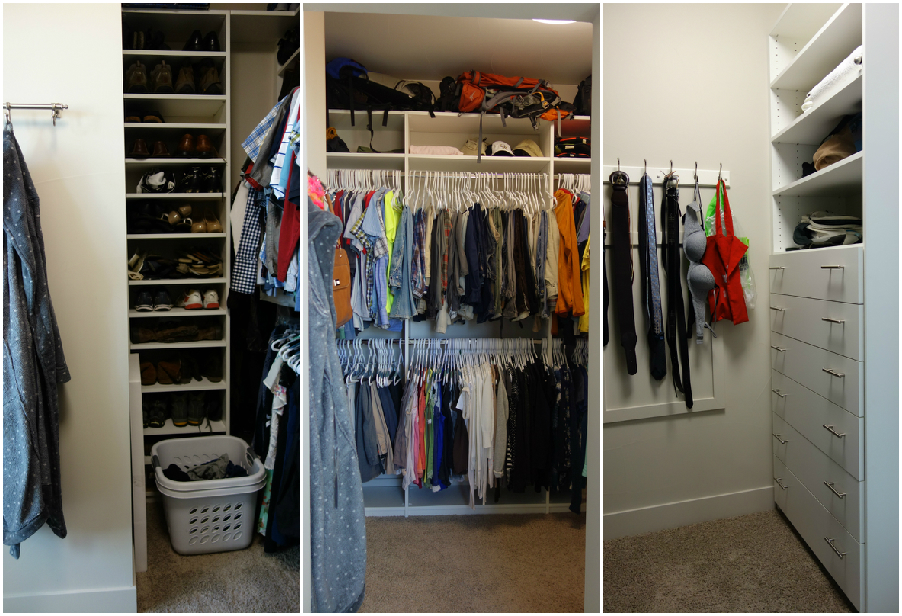
The closet. Yes, I realize we have a lot of clothes in our closet, but look how organized we are! Drawers and a shoe-tower were must-haves in the bedroom since we needed extra space to store clothing that we didn’t want to fetch from the bedroom dresser… and who doesn’t need a shoe tower for their shoes?
The bathroom. One of the features we have pined over since seeing the model home was the “frameless” glass shower. So glad we splurged for this! There was an option to add a tub and in the master bathroom but I’m very glad we didn’t do this as we would not have used it enough. I love going to that empty corner and looking out the window! One day I’ll finally add a chair there.
One of my absolute favorite items in the whole house is in the master bathroom. It’s called a Vroom and it’s part of our central vac system. We love the central vac system in general because it has been super handy for cleaning the hardwood floors downstairs. The Vroom is a small vacuum located under one of the sinks with a hose that pulls out for quick and easy cleaning. It has been so useful because I lose more hair than a Golden Retriever on a 100-degree day! With the white tile floor, the Vroom has been a necessity to be able to clean up my hair on the floor easily. I don’t have to bother lugging a vacuum out of closet any time I want to clean the floors! My only regret is not getting one of these Vrooms in the laundry room (for all the lint and dirt that falls off of clothing) and in the kitchen for crumbs!
Window Treatments (so exciting!)

You may have noticed in our previous pics of the house undecorated that we had blinds installed on most of the windows before we even moved in. This was another DIY project that hubby rocked at! We planned ahead and measured all our windows while the house was still in its final stages of construction. Deliberating over colors and fabric choices for the roller shades was much harder work than measuring windows! We wanted to have our roller shades ordered, delivered, and installed by the time we moved in. We received our order of roller shades from Blinds.com just in time before moving day and hubby visited the house one evening to install the blinds for all of the first floor all by himself!
Future Projects
One of the big projects we have left for the house is to choose and install light fixtures. We had chosen not to have these installed by the builder because we thought we would do such a kick-ass job of finding our own cheaper light fixtures elsewhere, but it has been a challenge just finding light fixtures we like, much less cheap ones! But in any case, it was nice to put off this overwhelming task of deciding on light fixtures right away. We had enough to decide on when we were selecting options with the builder and vendors!
By the way, one of the biggest things I would change about the house (*tip for those building their own home) is the placement of light switches throughout the house. We thought we had carefully thought through all these electrical decisions, but for the most part, I guess we just trusted the vendor with their standard placement of light switches, which ended up not being a good decision on our parts! We are still getting used to some light switches that are located in inconvenient spots!
Our other very big project is back yard landscaping. While the front yard landscaping is completed by the builder (which took almost 4 months after our closing date), the back yard landscaping is the owner’s responsibility and must be completed within 9 months of moving in. After getting a jaw-dropping quote from a landscaping company, we found out that this would most certainly be a DIY project.
P.S. – If you hadn’t noticed, my dachs followed me around the house for this photo shoot (I don’t have 10 dachshunds).
