To save money on our new home purchase, hubby and I had a whole list of home projects we wanted to do ourselves that, in some cases, would have cost us double or triple to have the builder do. In this “Midtown DIY” mini-series on my blog, I will feature some of those small home projects we took on!
————————————–
The very first project we did in our new home was add shades to the windows. In fact, not only was it the first project, but we started this project before we had officially moved in. This wasn’t something that was offered by the builder (that we know of) and we wanted to make sure we had privacy right when we moved in.
The model homes in our neighborhood showcased roller shades as the window treatment of choice, and we had to agree that these suited the modern style of the homes better than traditional blinds. Furthermore, roller shades allowed us to take advantage of the light that the many windows brought in.
The drawback of roller shades is that they seemed to be fairly costly. We heard of one neighbor in the ‘hood paying $5,000+ for their professionally-installed Hunter Douglas roller shades, the impressive-looking brand that was featured in the model homes. The thought of paying that much for shades gave us a stomach ache so we sought out cheaper options. Although there was a neighbor in our ‘hood that was highly recommended for the purchase and installation of blinds, after watching a few YouTube videos of the installation process, we figured we could save even more money by both purchasing and installing them ourselves. All of the stores (physical and online) that offered blinds seemed to be all the same, so we blindly (pun intended) settled on Blinds.com.
We ordered a million samples of different colors and “openness” (the amount of light the solar shade allows in) to test out in our new home. Picking a color that complimented the wall color was relatively easy, but deciding on “openness” was not so easy. While we wanted privacy in our home and for neighbors to not be able to peer in through our many windows, we also wanted to take advantage of the light that all the windows brought in. We eventually decided on 3% openness for our shades downstairs, which would allow in light during the daytime hours and also for us to be able to see the scenery outside our home when the shade was fully down, but also for neighbors to not be able to see inside our home too easily at night.
Testing shade samples
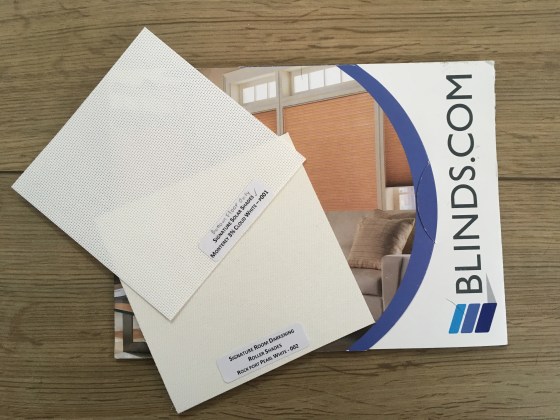
The final roller shade colors that we ended up choosing for our home: Monterey 3% Cloud White semi-transparent shades for the downstairs and Rockport Pearl White blackout shades for the upstairs.
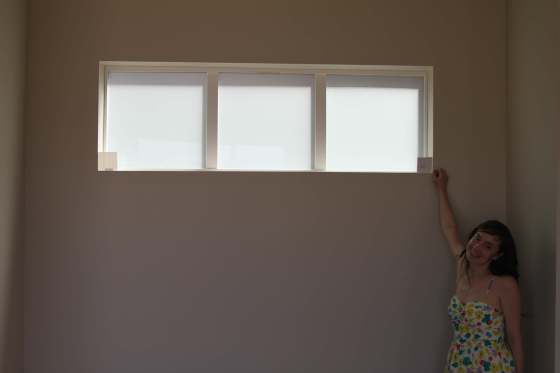
Two months before we closed on our home, the windows were framed out and ready for our eager hands to measure them! Even though there are several homes in our community with the same floor plan, we still needed to take the precise measurements of our windows since the size of the windows can vary slightly from house to house. In fact, even the same window could measure slightly different in width or height depending on where we measured it (in the middle or towards the side of the frame). Needless to say, we measured and remeasured our windows until we were blue in the face with numbers down to the tenth of a decimal point (side note – height didn’t need to be as exact as width).

Hubby measuring windows and playing with his favorite thing, numbers!
After measuring our windows and agreeing on a shade color and openness, we braced ourselves for the cost of window treatments. We decided to prioritize getting window treatments on the first floor only for our first go-around, which would allow us to decide whether we liked the company’s product and also for us to budget for the next round of shades for the second floor. The first order of shades for the first floor of our home ended up costing approximately $1,200 and took about two weeks to arrive.
Once we closed on our home and had keys, our first order of business was to install our new blinds! Hubby was able to complete the installation all by himself after following the straight-forward 2-page instructions that accompanied our order. Hubby only needed a few basic tools like a drill, screwdriver, and pliers.
We were very pleased with our first experience of ordering and installing shades from Blinds.com (who doesn’t like the free hubby-install option?), so after we were settled in our new home, we proceeded with our second order of shades for our upper floor. Since all the bedrooms are located on the upper floor of our home, we figured black-out roller shades would be more appropriate. For our master bathroom, we chose cellular/honeycomb top-down-bottom-up shades, which would allow us to pull the shade from the bottom up, giving us privacy in the bathroom, but also allowing light in through the top of the window. The second order of shades turned to be out slightly more expensive because of the black-out and cellular shades, totaling approximately $1,800.
We spent a grand total of about $3000 on our DIY shade project and couldn’t be happier with the results!

Hubby installing shades all by himself.
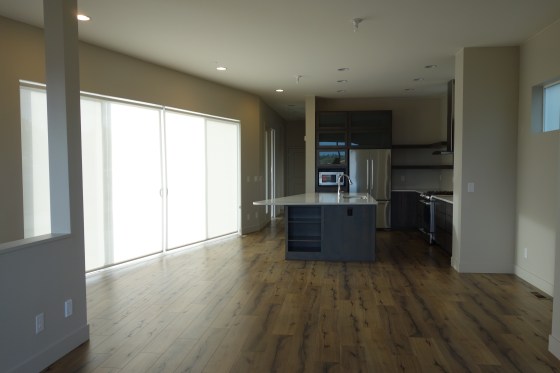
Shades installed on our big sliding door before we moved in.
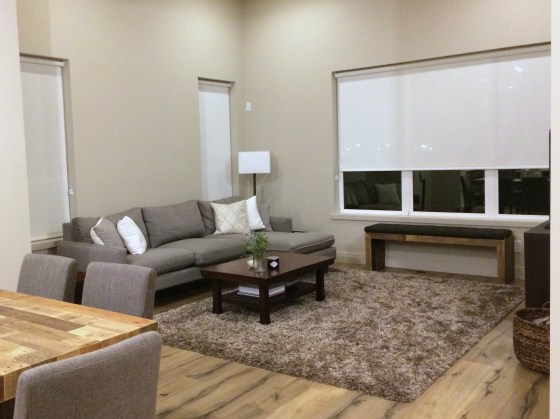
Shades in our living room.
