In the last blog post, I detailed how hubby had spent the months between July and November of the first year in our house, landscaping our backyard.
It’s kind of funny looking back on how I naively thought DIYing our backyard would just take a couple of weekends, but it ended up taking several nonstop weekends for months. I think that’s how a lot of DIY projects go though; you think you’ll save a lot of money by spending a little bit of your own time, but you end up spending a lot of time to save a little bit of money.
Nonetheless, we had accomplished a relatively long list of yard work projects that first year and it was time to take a break while our yard was hibernating for the winter.


We hadn’t had a chance to plant any of the pretty green stuff a yard should have, but we had done the following before winter came:
- Built an underground retaining wall to help with drainage
- Built a concrete step from our patio to help with the steep drop off from the patio to the yard
- Built concrete slabs for our grills, hose reel, and trash bins
- Built a wooden fence enclosure to hide the trash bins
- Installed sod on half of the yard
- Installed rock on the other half of the yard
- Laid down a small flagstone patio at the end of the yard
- Purchased and connected a gas fire table
- Purchased patio furniture
In April of the following year, hubby began his first backyard project of the season — staining our wooden fence. Our fence had taken somewhat of a beating the first few months from the rainy summer and the snowy winter and by spring, it was beginning to look a little “rustic”.
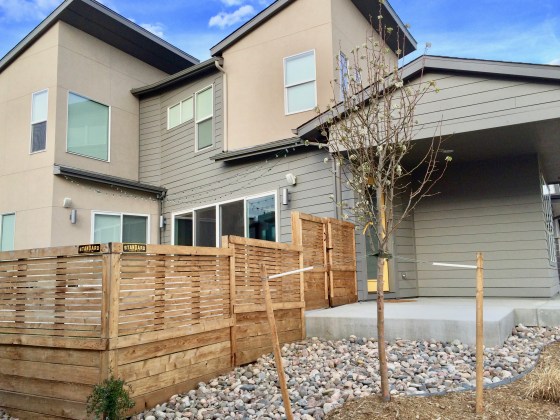
While I didn’t necessarily mind this rustic look too much, I also didn’t want to prematurely age our wooden fence by not sealing and/or staining it. . . but I also was not looking forward to the task of picking out a stain color that I wouldn’t regret after the whole fence was covered with it. *ugh*
With every house design project I take on, it is always quite a long process for me to choose the item or design I want and confidently commit to it. Choosing a fence stain was no different. I think people choose tattoos quicker than I choose furniture pieces, home decor, and color options.
I had eventually settled on a fence stain by Behr called Cordovan Brown that was semi-transparent and an all-in-one stain and sealer to weatherproof the wood. We had tried several different samples on pieces of wood and none of them made me truly confident about committing to a color, even the Cordovan Brown we chose, but I had seen the Cordovan Brown on a wood fence featured on Houzz and really liked how modern it looked.
While I took on the “tough” task of picking out a stain color, hubby prepped the fence for staining by power washing it. Even just the power washing alone made a difference in giving the fence a new look.
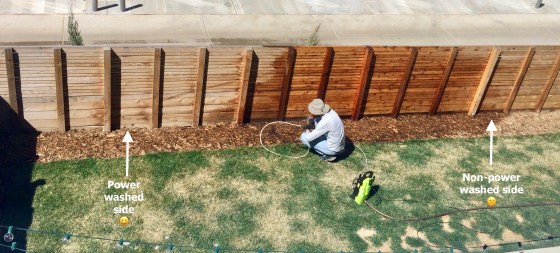
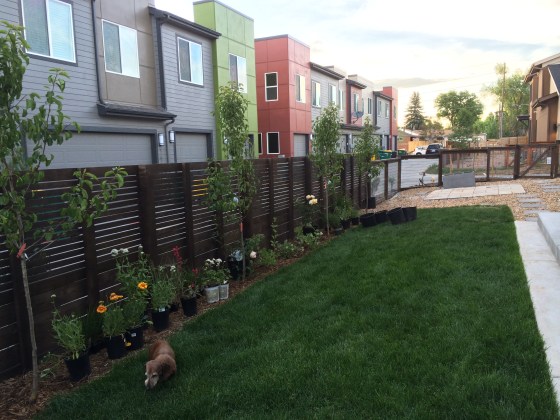
Hubby purchased an electric sprayer and accomplished staining our long fence in Cordovan Brown all by himself, and that was that! I wasn’t too excited with how dark the color ended up being, but the important thing was that it was done!


After making our fence brown, our next project was to make our yard green! Fortunately, we have a wonderful nursery two miles away from our home that makes trips to pick up trees and flowers quick and easy. This was especially important on our first trip to the nursery when we picked out a billion flowers and four trees that were literally flowing out of our vehicle.

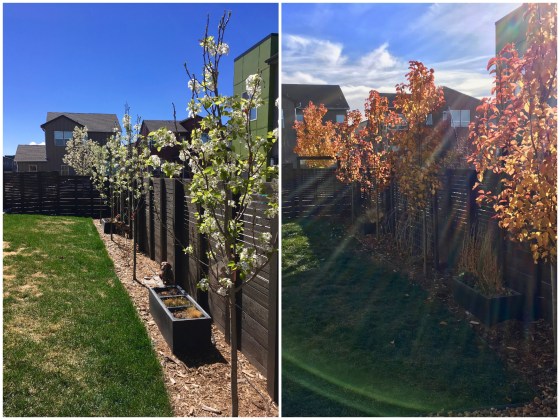
Even though the nursery employees were knowledgeable and helpful, we felt very clueless trying to pick out trees and flowers for our backyard. We had no idea what we wanted, so we eventually settled on four identical trees for our backyard, which were the same type of tree the builder had planted in our front yard — fruitless Chanticleer Pear trees. I had really liked how “bulky” and full the leaves looked on our front yard tree, as well as how colorful it was in the autumn and the white blossoms it produced in the spring. A year later, I’m still very happy with the type of trees we chose, and as a bonus, they have somehow survived our virgin care and two hail storms.
For flowers, I recklessly chose any and every type of flower I liked and threw in some ornamental grass for the heck of it. I had no idea what I was going to do with my haul and this ended up not being the wisest plan.
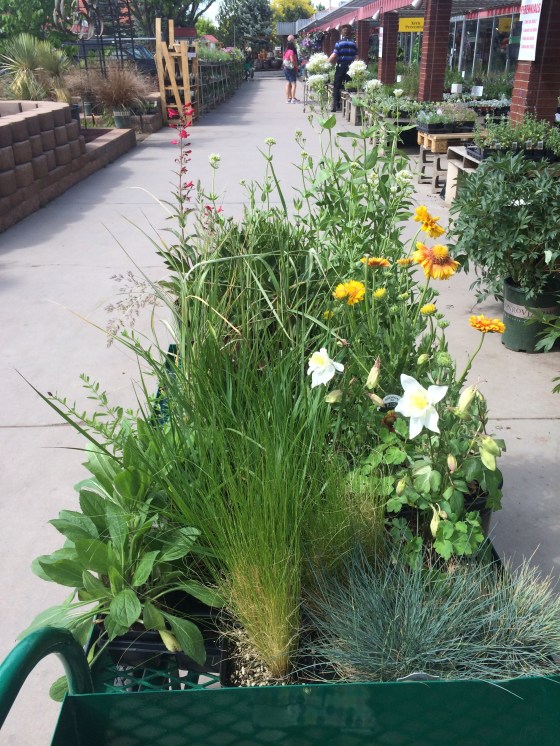
Hubby dutifully planted the four trees and left the flowers up to me. I laid them out along our fence in an approximate location of where I might plant them and they looked pretty damn good. Maybe these two novice gardeners would not do so bad at their first job after all!
But once I began randomly digging, I found out just how awful our ground was in Midtown. Even with the top soil and “clay buster” that hubby mixed in when he prepped the ground the previous summer, the ground still seemed like literal pottery.
We hadn’t received the same abundant amount of rain we had received the previous year (go figure, now that we had grass and trees!), so digging in dry, hard clay soil was proving to be quite the chore. Further complicating this was the fact that our underground retaining wall was mere inches below the ground where I was digging. Ideally, we should have made our perimeter garden a bit wider in depth to account for the underground retaining wall.
To this day, I still don’t know how hubby managed to plant the four trees he did along the fence with that underground retaining wall in the way.
I decided that I wanted to abandon the idea of planting things in the ground and forever dealing with that hard, clay soil. Instead, I picked out two overground planters from West Elm, positioned them again the fence between the trees and called it a day. The planters didn’t make our backyard look as lush, but they were certainly less of a headache and have allowed me to easily change out flowers in the spring when needed.


Besides shuffling around some rock to add stepping stones leading to the trash bins and also adding a grey planter to our front porch, that was pretty much a wrap for the summer as far as yard projects went!

Kale yeah! This Cityscape planter from West Elm rocks!
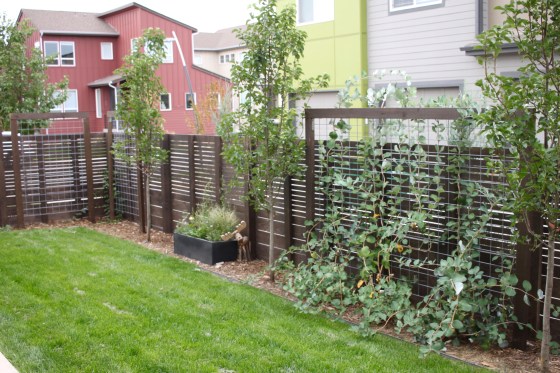
Fast forward to the following summer (this past summer), when we realized that we needed to give the three honeysuckle plants we had planted along the fence something to climb up, since they didn’t look so healthy or grow the first year they were planted.
Like many of our projects, I started out thinking we would just purchase something traditional and easy for a trellis for our honeysuckle, but this of course turned into me wanting [hubby] to DIY something modern. I searched the interwebs and settled on an appealing modern design that would require us to find thick metal cattle grating that was specifically in squares, that would fill the inside of a thick wood frame.
I’m obviously lucky that I have a husband that can make my visions come to life (and one who doesn’t mind searching a bunch of stores to find just the right supplies we need for a project) because the resulting product (…after a little micromanaging and a few corrections…) was just perfect!
The hardest part about the project was mainly finding metal grating for the vision I had in mind. After tons of searching, we found a ranch & home supply store called Murdoch’s that carried utility/cattle grating. I didn’t want the metal grating to be too thick that it would look like an actual fence, but also not too thin that it would look flimsy and cheap. We were able to find 6-gauge metal grating with 4″ x 4″ squares that I knew would be perfect for our modern trellis.
The metal grating panel was way bigger than we needed (16′ x 5′ !!!), so we had the store trim the metal grating in half. There would have been no way of getting that huge panel home otherwise! Other than the metal grating, we only needed a few other supplies for our project:
- 2×4 lumber pieces (which, did you know are not actually 2 inches by 4 inches?! The lumber is actually 1.5 inches by 3.5 inches, and I’m just finding this out for the first time, literally as I write this! I guess if you know, you know!)
- Wood staples to attach the metal grating down to the lumber (ours were 1″ long)
- Wood stain (or wood sealer if you don’t want to change the color)
- Corner braces (or L brackets) to connect the lumber frame together (ours were 5″ x 5″)
- Wood screws for the corner braces (ours were 2 inch deep)
- Cement and 1/2 inch rebar to make a support poles in the ground for the trellis
The project ended up being fairly simple and hubby didn’t even need much of my help to assemble it (yay for drinking chilled rose wine while shouting “suggestions” from the patio sofa to hubby as he toils away in the hot sun)!
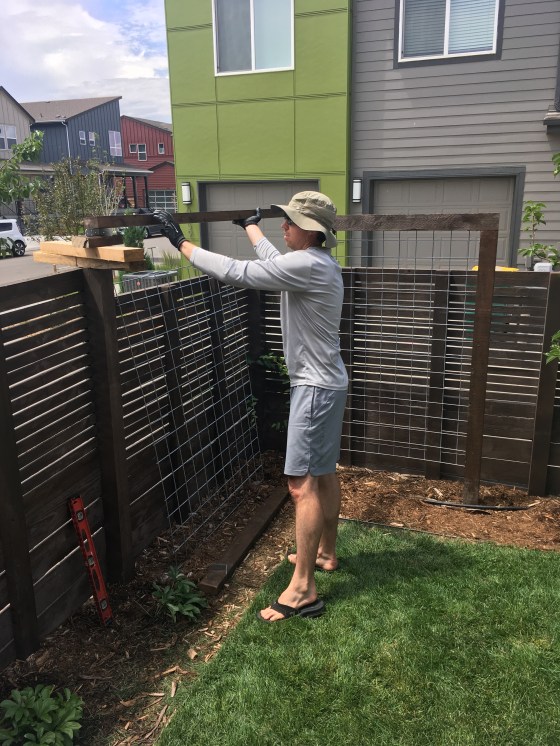
The first step was staining the lumber to match our fence. Once dry, hubby cut the lumber pieces to match the size of our half-panel of metal grating. I didn’t want a lumber piece on the bottom section of the trellis, so hubby only needed two corner brackets to connect the two side lumber pieces to the top lumber piece. Hubby then attached the metal grating to the wood frame by hammering the wood staples every few inches on the back side of the wood frame.
After the trellis itself was assembled, the last step was building a sturdy support for it in the ground. To do this, hubby drilled two holes into the bottom of the vertical wood frame lumber pieces that would be thick enough to fit a 1/2 inch rebar and about 4 inches deep (the length the drill bit could reach into the wood). After measuring the distance between the two drilled rebar holes in the lumber posts, hubby then cemented the rebar into the ground the appropriate distance apart to match the lumber post holes.
The final step was setting the wood frame over the rebar posts and hammering the wood posts down as far as they would go. Hubby ended up having to trim off a few inches of the rebar with a reciprocating saw when we realized the height of the rebar was too high for the depth of what we had drilled into the wood frame posts, but after this little snag, our trellis was complete!


Although we had only planned on doing only the one trellis in the middle of the yard, we got tired of seeing the leftover metal grating sitting around in our garage, so we cut that 1/2 panel piece in half again with a reciprocating saw and turned it into two more tall trellises for the corner of our yard.
The second trellises ended up being a little more tricky to build since we had to account for the slope in our yard. Thankfully, my nerdy engineer hubby was able to figure out what length the vertical posts needed to be in order for the adjacent trellises to be even with each other, and the resulting product was worth all the careful measuring and effort we hubby did!


For now, we are done DIYing backyard projects, but one day we might consider extending our fence up for some more privacy and adding a vegetable garden. Until then, we are enjoying the lush and modern backyard that hubby built with his own two hands!